Window Seat Completed
10 Nov 2008Believe it not I actually do other things beside play with computers (not much more but at least it’s something). After 12 years of living in our house we did a kitchen remodel. We updated appliances (stainless steel, I love it), granite counter tops and a new backsplash. We already had some very nice cabinetry work so we kept it. One of the last pieces was a window seat for the kitchenette area.
Custom woodworking is darn expensive. Heck, the wood for this project could easily run some where north of $400 if you bought it retail. Fortunately, I have access to some incredible bargains and expertise via a local wood working club (http://semiww.org). I picked up a 100 board feed of Cherry for 75 cents a board foot. Cherry, depending on the quality can range from $4 - $9 a board foot depending on quality and cut.
My wife use to chide me a bit about buying wood in quantity this way. The lumber is rough cut meaning it looks like old used wood from a barn. The stuff you get in the store has been planed and edged which is why it looks better. She would gasp when I told her I spent $100 or $200 or whatever the price was for what looked like a pile of scarp. I’d tell her that it really was a bargain but she wouldn’t believe me. I finally put an end to the issue when we were in Home Depot one day. I showed her some 1x8x8 Cherry in the rack. The price read something like $5-$6 on the tag below the rack. She first thought that was the price for the entire plank. When I pointed out that the price was per linear foot, she quickly did the math and exclaimed “that piece of wood is $48!” I’ve not had a problem since…
I had to air dry the Cherry at that price but that’s really nothing more than leaving outside, neatly stacked, with thin scraps of wood between the layers (called stickers) to let the air flow around it. A few years later and your good to go. Sure, it requires some forethought, but for the price, it’s worth it. Of course I didn’t know at the time I was going to build a window seat with it, but having the stock when I needed it sure was handy.
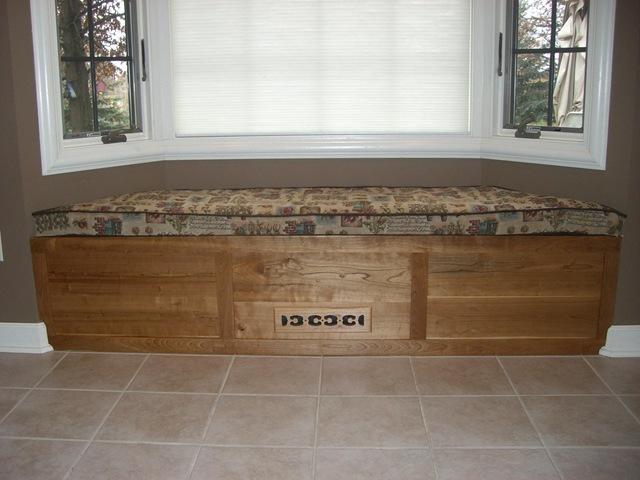
This is a classic “Rail and Stile” type construction where a frame is built and panels are “floated” in groves in the frame. Traditional construction dictates mortise and tenon joinery but being a modern (and lazy) woodworker, I opted for pocket screws. They’re just faster and easier and I’m all for that. The vent cover is store bought and hooks up to the heater vent that the bench covers. The super-structure of the bench itself is simple 2x4 construction and is free standing. The structure is simple, rugged and will take pretty much any load, short of a tank, placed on it.
The most difficult part of the project was fitting the corners to the floor molding. I didn’t want to remove the molding in case someday we decide to remove the bench. Because it is free standing, it can simply be removed for servicing the duct or if we decide to remodel in the future. The picture makes the fit look better than it is. Scribing an edge and fitting is something I don’t do often (maybe ever) and practice is the key to getting it right with these kinds of skills. One thing I’ve learned with furniture making over the years is that your “builder’s eyes” are far more critical and perceptive than your everyday, “use it eyes.” Imperfections I anguished over during builds disappear after few days.
The finish is natural meaning no stains or dyes. I used 3 coats of a wiping varnish (General Finishes brand) with some light steel wool between coats. The cushion was made by my wife with the help of a friend.